How To Configure the Grid: Advanced Example
In this next example we will repeat most of the steps taken in the first example. However, this example will have a few more constraints.
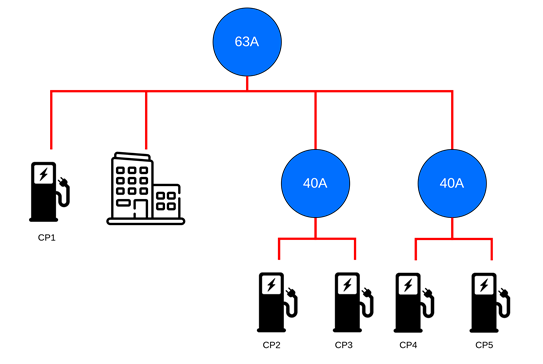
This example has a main fuse of 63A. On this fuse panel is the building and a single chargepoint. This office building has 2 40A cables which provide power to 2 chargepoints each. This situation is shown in the next image.
Because we have an uncontrollable load in this grid (the building) there is a need for an energy meter. As stated in How to configure an Energy Meter the preferred way of using an energy meter is to connect it as close to the fuse panel as possible. There is also the option to use the energy meter to only measure the building's current. But this is discouraged because you will get more safety when the same energy meter guards the entire grid. Also note that the 2 40A sub-grids don't need an energy meter because there are no uncontrollable loads in them and the main installation is already guarded. So, when we:
- Connect the stations to Edge,
- Finish installing an energy meter and configuring the Energymeter in Edge
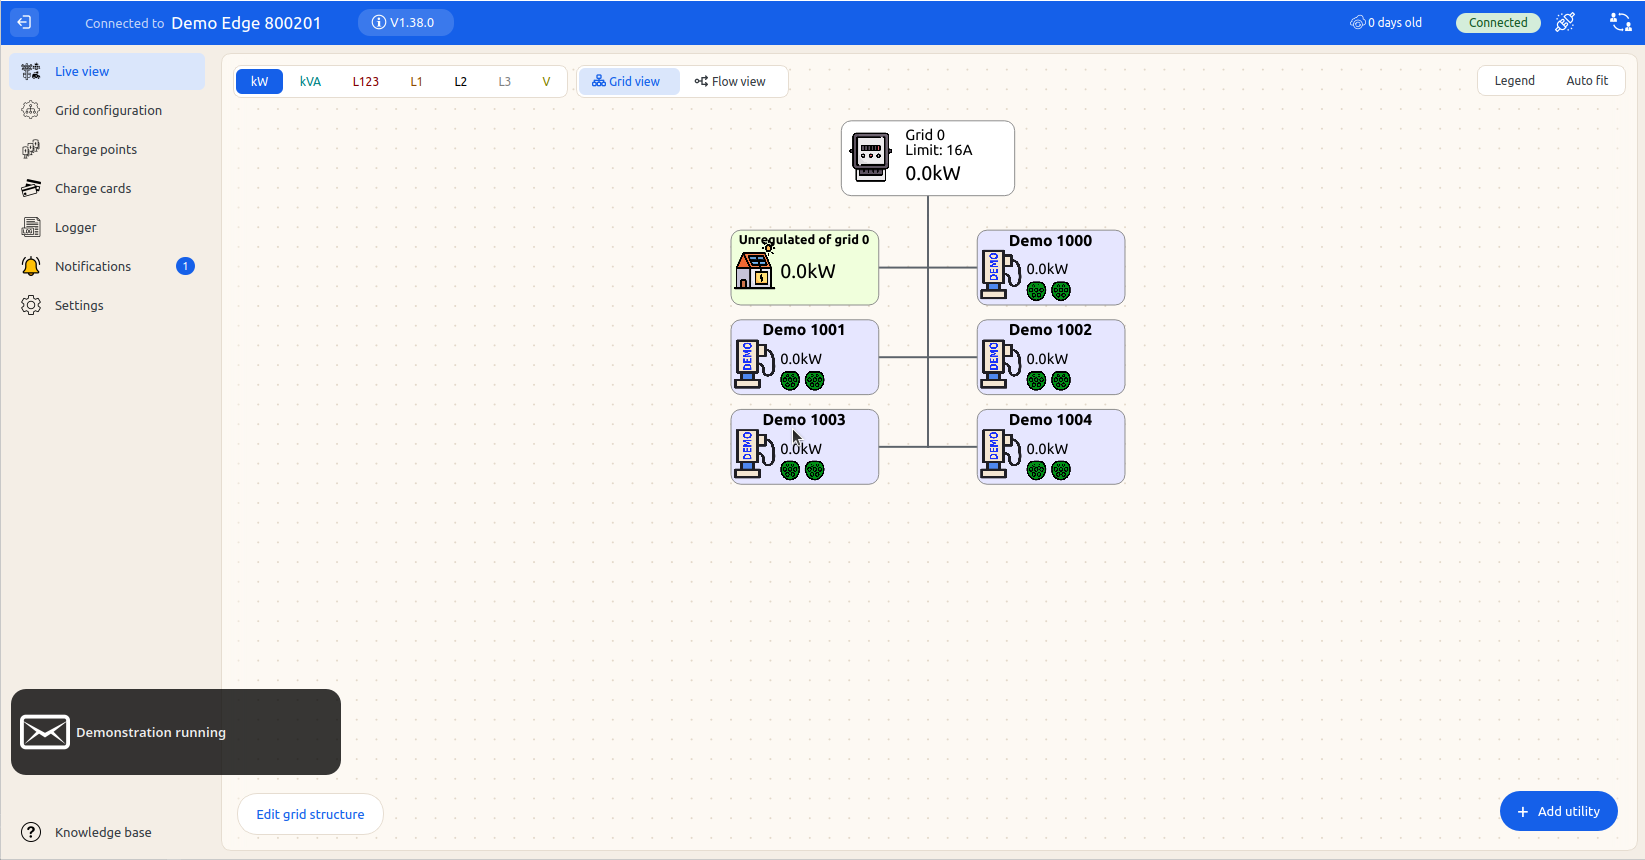
we will end up with the following situation. The left image is the current "live view" without any configuration. The right image is an illustration of a simplified installation we want to configure.
Grid Configuration
Now everything is installed we can click on the live view Edit grid structure button int the bottom left, and start creating the new grids for the new constraints
By default every new device will be added to grid-0. This means that in our example the energymeter is already in the right place, and we only have to create a few sub-grids
Click with the right mouse button on grid-0, and select "Add sub-grid"
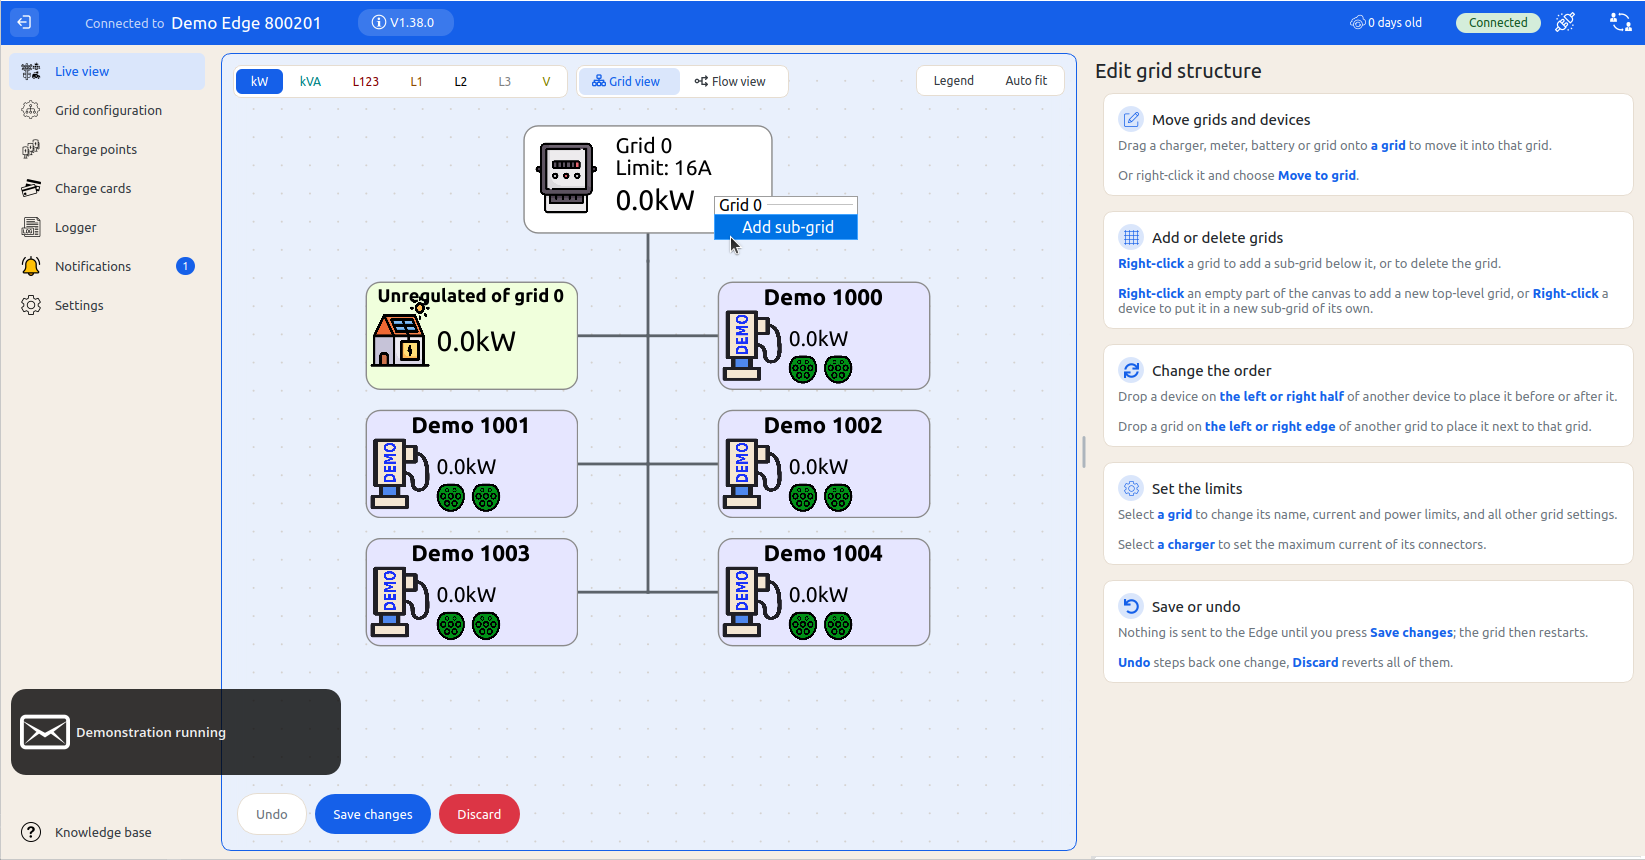
Repeat this twice to create 2 sub-grids. Note that the newly created subgrids will have a warning label indicating that they need to have a limit assigned
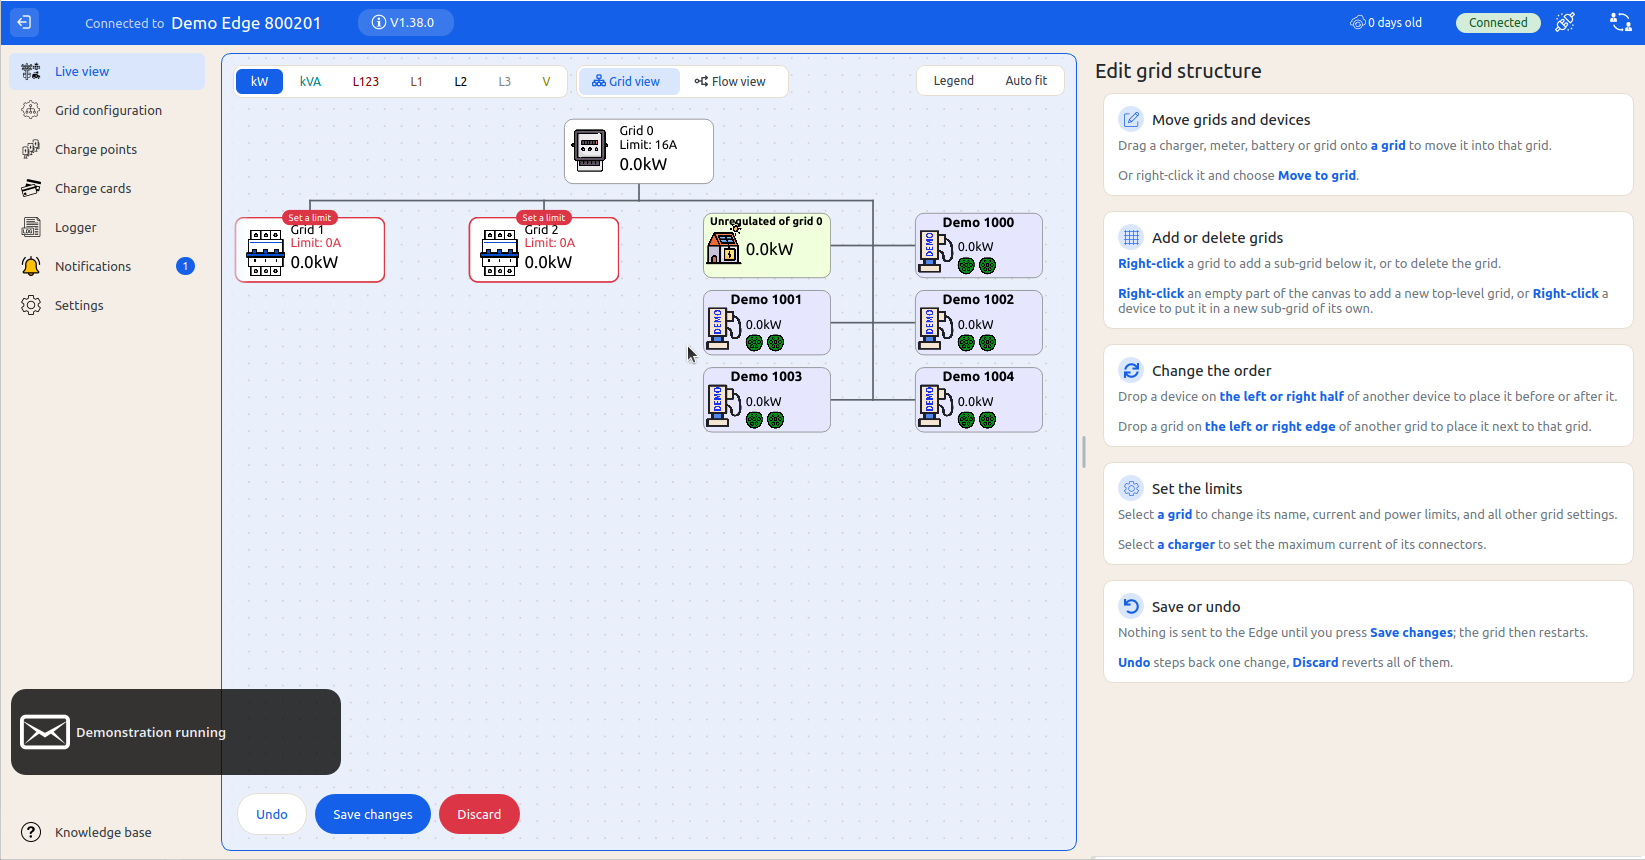
The next step is to Drag and drop the chargers to the correct grid. 1 of the chargers will remain at grid-0. And the other 4 will be added to the new subgrids.
The final step is to Configure the limits as done in the first example. Click on each grid, set the correct limit and give the grid a recognisable name.
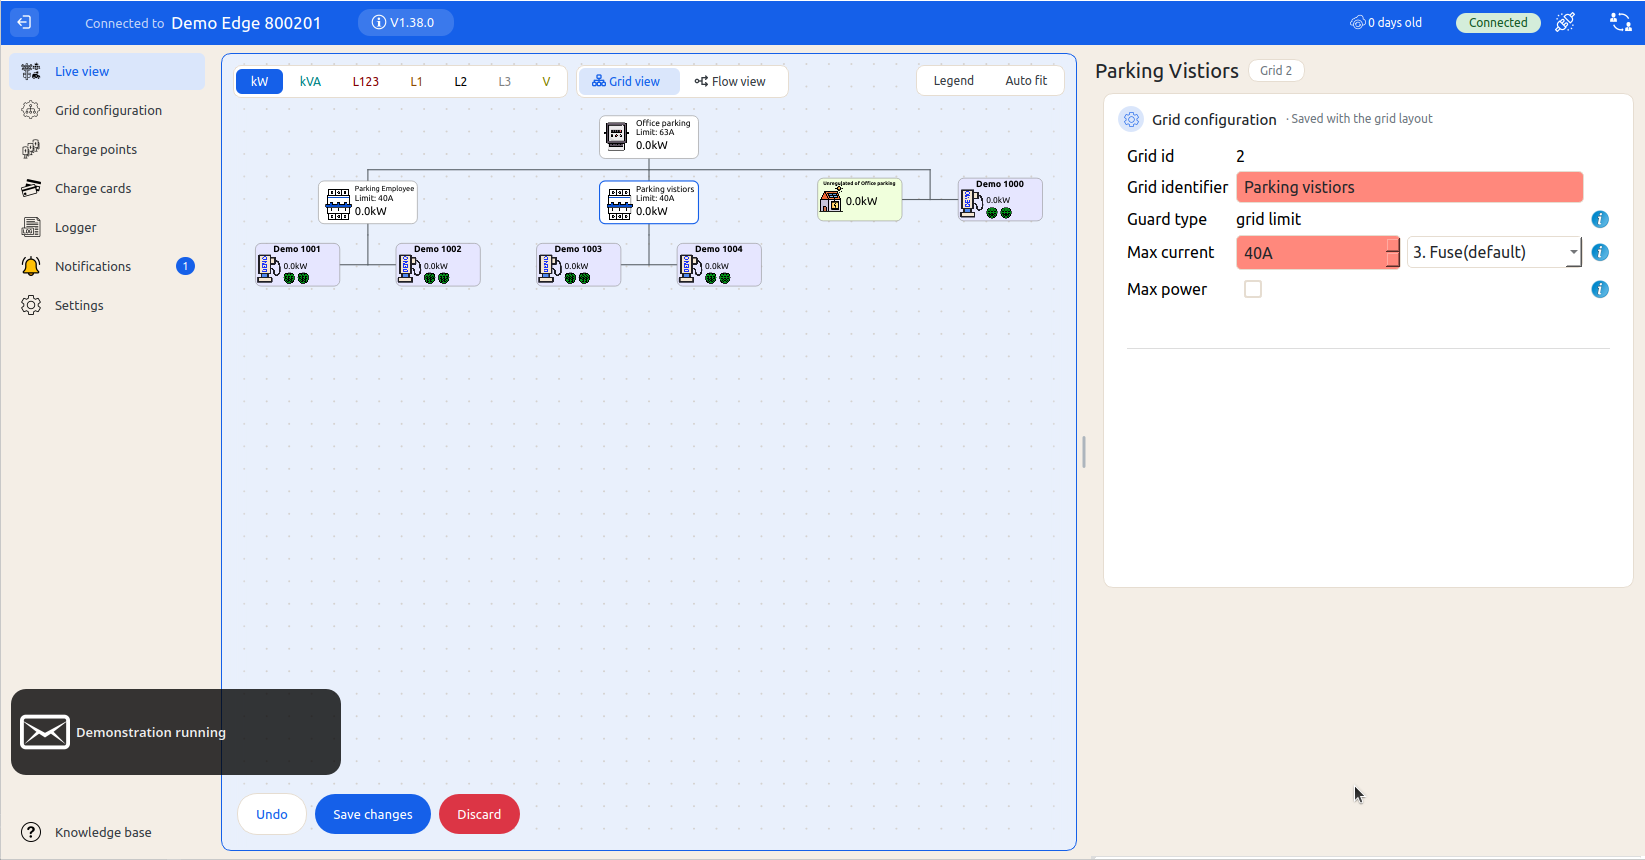
Press Save changes.
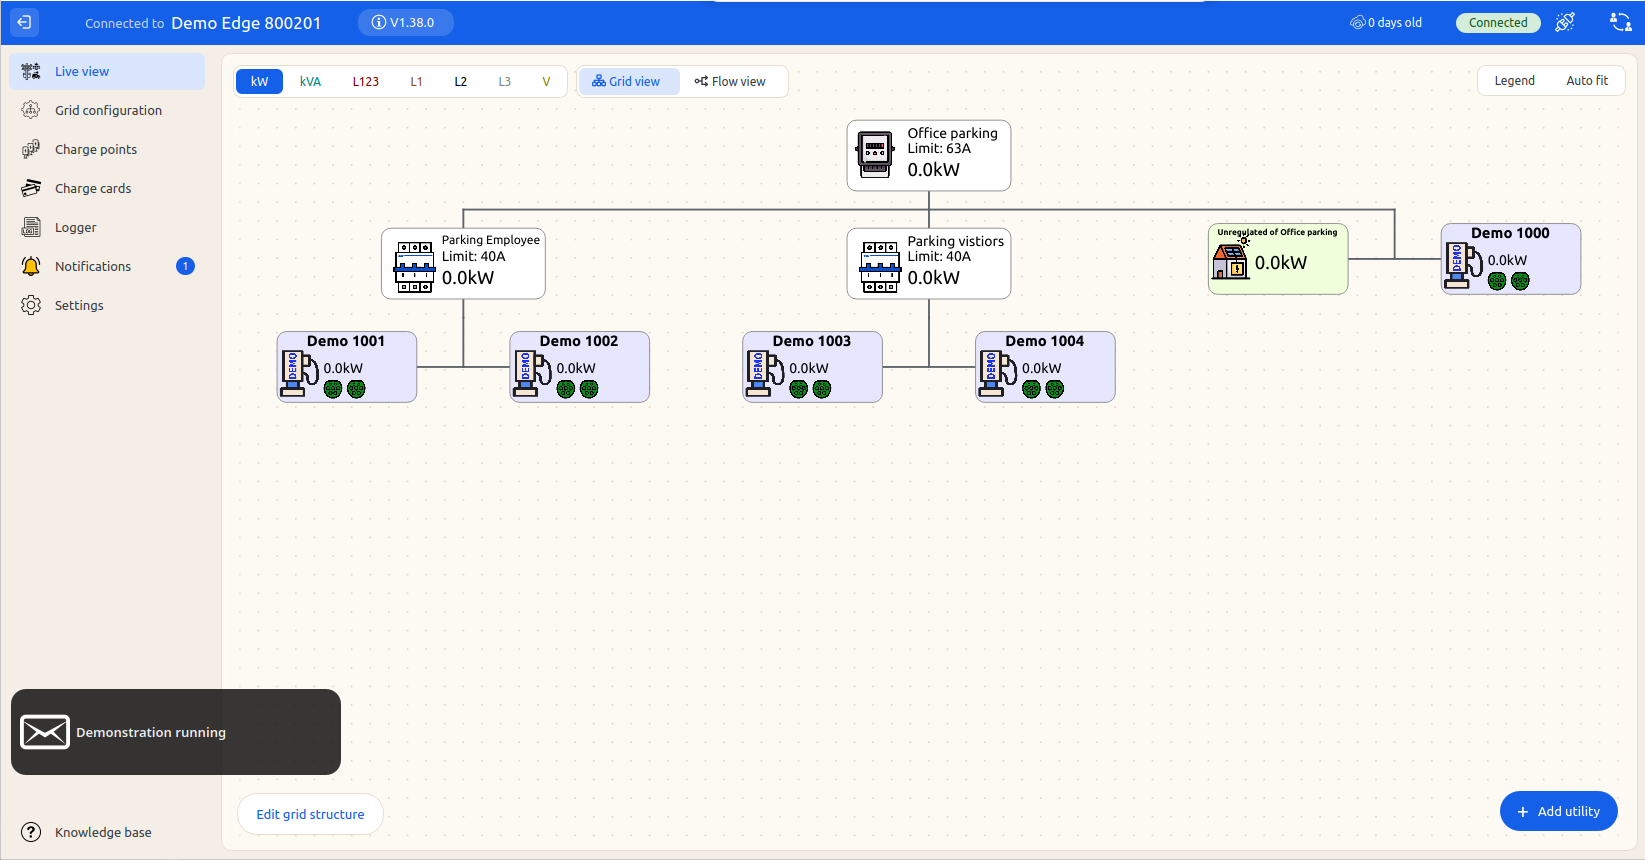
The grid is now ready for loadbalancing
Updated 3 days ago